Category: Olimex

Create your personal Web hosting 3

Up to now we have an inexpensive system that can answer to http request.

But the ip we use, is a private one (means it start by 192.168.*). And I’m quite sure that a thousand persons worldwide use the same private. It’s not a problem as far as your using it in your private area, but if you want everybody to access from Internet to your Olimex Box, you have to find a solution.

The only device that have a public adress is your Box, and when any of your device wants to communicate, the Box forward the trafic to your device, and replace its adress by the private one.

So you are facing several problems, and solution might depending on your internet provider.

But you must do theses steps:

ensure that your web server has always the same Ip (private IP). It will help to always have the same rule to


Create your personal Web hosting 2

Now we know that Apache can handle a sufficient number of request, the next step is to test with a real running server. For this purpose I will use WordPress.
WordPress needs a database, but the box use a sdcard as a mass storage, which is not recommended and should be avoid. To handle this problem I will use an USB port to plug a USB key or later a hd disk if needed. To easily switch I will do an logical link in the system to change the target of the mass storage. Insure that you install a raid solution (see http://olinuxino.4pro-web.com/how-to-speedup-access/)

apt-get install mysql-server
mysql_secure_installation
apt-get install php5  php5-mysql
apachectl restart

Now download wordpress

cd /mnt/raid
wget https://wordpress.org/latest.zip
unzip latest.zip
chmod  -R 755 wordpress
chown -R www-data
String link = "http://www.megatome.com";
System.out.println("Hello World");
System.out.println("Goodbye World");

Now it’s time to install wordpress

Edit the file /etc/apache2/sites-enabled/000-default and change the value DocumentRoot to your external hd ( /mnt/raid/wordpress in my case)
Then go to your laptop and in your web browser type your box ip adress (192.168.1.71 in my case).

Be careful if you have errors like can not insert or create databases, ensure that the mass storage have 755 authorization?

Now if you succeed installed wordpress, from your laptop, you have a site in 192.168.1.71

Now we gonna tweak apache. As I have already said sd card are not reliable. So we gonna put logs from apache to memory. The log will be

accesed like a filesystem, but will be stored in memory and will deleted if you reboot your box. Nevertheless you can add a script to store at specific time.
Debian has a specific filesystem named tmpfs, so my /etc/fstab looks like:

1
2
3
4
5
6
7
8
9
10
11
12
13
# /etc/fstab: static file system information.
#
# <file system> <mount point>   <type>  <options>       <dump>  <pass>
/dev/root      /               ext4    noatime,errors=remount-ro 0 1
tmpfs    /run/shm    tmpfs    defaults    0 0
tmpfs    /tmp        tmpfs    defaults    0 0
tmpfs    /var/tmp    tmpfs    defaults    0 0
tmpfs    /var/log/apache2    tmpfs    defaults,size=50M    0 0
/dev/nanda   /media/nand auto    rw,user,noauto,exec   0   0
#/dev/sda1   /media/hdd auto    rw,user,noauto,exec   0   0
/dev/sda1       /mnt/sdb1           ext4    defaults        0       0 
/dev/sdb1       /mnt/sdb2           ext4    defaults        0       0
/dev/md0 	/mnt/raid	ext2	defaults 	0	1

Now we have the same problem with the mysql database, so I will move it into the Usb key (raid1 in our case).
To do so:

1
2
3
4
5
6
service mysql stop 
mv /var/lib/mysql /var/lib/mysql-old
mkdir /mnt/raid/mysql
ln -s /mnt/raid/mysql /var/lib/mysql
cp -pr /var/lib/mysql-old/* /mnt/raid/mysql 
/etc/init.d/mysqld start
1
ab -n 400 -c 50 -g test_data_1.txt http://192.168.1.71/
1
2
3
4
5
6
7
8
9
10
11
12
13
14
Document Path:          /
Document Length:        251 bytes
 
Concurrency Level:      50
Time taken for tests:   30.235 seconds
Complete requests:      400
Failed requests:        0
Non-2xx responses:      400
Total transferred:      242800 bytes
HTML transferred:       100400 bytes
Requests per second:    13.23 [#/sec] (mean)
Time per request:       3779.398 [ms] (mean)
Time per request:       75.588 [ms] (mean, across all concurrent requests)
Transfer rate:          7.84 [Kbytes/sec] received

Result are not very good. Indeed we can serve only 13rq/s. So let’s try to optimize:

sudo apt-get install php-apc 
vi /etc/php5/apache2/php.ini
add extension=apc.so at the end of the file

Add WP Super Cache to your WordPress installation and then we have a fully functional site.

At conclusion we can support 50rq/s

our environment can support a big number of requests,son in the last part of these articles I will show you how to put your website on the web.

ab -n 400 -c 50 -g test_data_1.txt http://5.49.77.158/
Server Software:        Apache/2.2.22
Server Hostname:        5.49.77.158
Server Port:            80
 
Document Path:          /
Document Length:        9287 bytes
 
Concurrency Level:      50
Time taken for tests:   4.262 seconds
Complete requests:      400
Failed requests:        0
Total transferred:      3836400 bytes
HTML transferred:       3714800 bytes
Requests per second:    93.84 [#/sec] (mean)
Time per request:       532.798 [ms] (mean)
Time per request:       10.656 [ms] (mean, across all concurrent requests)
Transfer rate:          878.96 [Kbytes/sec] received

How to set up a raid 1 filesystem

As I previously, written I’m trying to use the Olimex A20 as a web server and using a Usb key as mass storage.But you might not forget that an usb device is not a very reliable device, so I will show you how to set a raid system that will improve reliability.
A Raid system use at least two device and copy data on both of the (at least for Raid 1). It means that if one of them broke, you have a backup.
But I do not have idea, how it can impacts performance, it’s the subject of this article.

A friend of mine, gave me two inexpensive usb key, so I wll test them.

To have a reference, I test my two usb keys.

For my first key

For small file

dd bs=1K count=512000 if=/dev/zero of=test conv=fdatasync 
512000+0 records in 
512000+0 records out 524288000 bytes (524 MB) copied, 82.303 s, 6.4 MB/s

For big file (1M)

dd bs=1M count=4120 if=/dev/zero of=test conv=fdatasync
3720+0 records in 
3719+0 records out 3900125184 bytes (3.9 GB) copied, 578.207 s, 6.7 MB/s

For my second key

root@a20-olimex:/mnt/sdb1# dd bs=1M count=3900 if=/dev/zero of=test conv=fdatasync 
3720+0 records in 3719+0 records out 3900588032 bytes (3.9 GB) copied, 647.667 s, 6.0 MB/s 
root@a20-olimex:/mnt/sdb1# dd bs=1K count=812000 if=/dev/zero of=test conv=fdatasync 
812000+0 records in 
812000+0 records out 831488000 bytes (831 MB) copied, 140.967 s, 5.9 MB/s

It my second key seems a bit slower
Now we can create a raid 0 to see if it improves speed
There’s a special command to create a raid, it’s name is mdadm.

apt-get install mdadm
umount /dev/sda1
umount /dev/sdb1
sudo mdadm --create /dev/md0 --level=1 --assume-clean --raid-devices=2 /dev/sda /dev/sdb

If you do

Now /dev/md0 is seen as a normal partition, now we just have to create a partition

Edit /etc/fstab and add the folowing line

/dev/md0 /media/raid ext2 defaults 0 1
mount -a

And normally you have a new mounted partion under /mnt/raid, wich « concatenate » sda et sdb wich capacity is lowest capacity

Now check the speed of the raid:

cd /mnt/raid
dd bs=1K count=512000 if=/dev/zero of=test conv=fdatasync
512000+0 records in
512000+0 records out
524288000 bytes (524 MB) copied, 171.296 s, 3.1 MB/s
root@a20-olimex:/mnt/raid# dd bs=1M count=2900 if=/dev/zero of=test conv=fdatasync
2900+0 records in
2900+0 records out
3040870400 bytes (3.0 GB) copied, 977.195 s, 3.1 MB/s

This result is normal, in raid1 data are copied on both usb key so performance divided by two is what we should expect.
Now we have several choice:
keeping good performance but have something less reliable. You have to know that if you plan to keep your A20 24 hours a day, your gonna facing because your hardware will be warm for a long time. For my point a view, if your not interested in performance, a USB raid can be a solution, but you can keep the solution with Hd disk if you want. In this case you gonna have better performance. But the in practical it is the same manipulation.

As a result you have something like that:

Create your personal Web hosting 1

As some of my personal/professional web hosting are to renewed, I was thinking of moving them to my Olimex A20.

Reasons why I think the A20 can be a solution:

  • low power consumption , so I can leave it on
  • my site have a small audience so performance is not a bottleneck ( I’m not sure a mutual hosting have better performance)
  • I can control exactly services started, can be very formative and challenging
  • Spend my money to buy something that I can use later instead of renting something
  • For the price of one year of web hosting I can buy a new A20
  • It’s challenging and I might learn a lot of things/li>

The other side of the coin

  • Very difficult to configure (you have to configure a lot of thing DNS,Apache,open your internet connection)
  • You are now responsible for the security of your system (you’re opening your system to Internet)

Starting from fresh installation

To decide first I must have an idea of the performance of an installed apache and I will remove all unused things (X-windows for instance)
Removing unecessay modukes and services
I started from a fresh installation and configure the network as I explained on a previous article.
I removed unnecessary X-windows lib, the box will start faster and I can keep data on the sd card.

Removing unnecessary modules

apt-get remove --auto-remove --purge libx11-.*
apt-get autoremove --purge

Before:

 /dev/root 3808912 2634612 980816 73% /

After that:

free -m
total used free shared buffers cached
Mem: 874 63 811 0 2 34
-/+ buffers/cache: 26 848
Swap: 0 0 0

I know I can win more memory by switching to mono-user and allow only one terminal. But I will do it in a later version.

You can also remove unnecessary modules:

lsmod

Module Size Used by
cpufreq_powersave 1207 0
cpufreq_userspace 3318 0
cpufreq_conservative 6042 0
cpufreq_stats 3699 0
g_ether 55821 0
pwm_sunxi 9255 0
gt2005 13408 0
nand 114172 0
sun4i_keyboard 2150 0
ledtrig_heartbeat 1370 0
leds_sunxi 3733 0
led_class 3539 1 leds_sunxi
sunxi_emac 34009 0
sunxi_gmac 29505 0
8192cu 454131 0

free -m
total used free shared buffers cached
Mem: 874 63 811 0 2 34
-/+ buffers/cache: 26 848
Swap: 0 0 0

I can remove modules that handle video memory:
After that:
rmmod sun4i_csi0 videobuf_dma_contig videobuf_core ump lcd sunxi_cedar_mod gt2005
free -m

total used free shared buffers cached
Mem: 874 62 812 0 2 34
-/+ buffers/cache: 25 849
Swap: 0 0 0

<h3>Raw Performance</h3>
By default apache is installed, to test do
<div class=”wp_syntax”>
<table>
<tbody>
<tr>
<td class=”line_numbers”>
<pre>1

wget -O- http://192.168.1.171/

He will fetch index.html in /var/www

First step I try to know how much request this apache can handle. From my laptop I use a very useful command named ab that call concurent request and report time and how many request handled. From my console I type

1

ab -n 4000 -c 100 -g test_data_1.txt http://192.168.1.71/

with 4000 means how many request to use, 100 means number of client, test_data_1.tx is the gnuplot output and you can put the url you want to test.

1
2
3
4
5
6
7
8
9
10
11
12
Server Software:        Apache/2.2.22
Document Length:        999 bytes
Concurrency Level:      100
Time taken for tests:   3.426 seconds
Complete requests:      4000
Failed requests:        0
Total transferred:      5104000 bytes
HTML transferred:       3996000 bytes
<strong>Requests per second:    1167.60 [#/sec] (mean)</strong>
Time per request:       85.646 [ms] (mean)
Time per request:       0.856 [ms] (mean, across all concurrent requests)
Transfer rate:          1454.94 [Kbytes/sec] received

To test in a more real example I did on the box

1
2
cd /var/www
wget -r -O  http://olinuxino.4pro-web.com/

From my laptop

1
ab -n 400 -c 100 -g test_data_1.txt http://192.168.1.71/olinuxino.4pro-web.com/index.html

SELRES_0.5579080039592403SELRES_0.5579080039592403

1
2
3
4
5
6
7
8
9
10
11
12
13
14
15
16
Document Path:          /olinuxino.4pro-web.com/index.html
Document Length:        48352 bytes
 
Concurrency Level:      100
Time taken for tests:   1.756 seconds
Complete requests:      400
Failed requests:        0
Total transferred:      19452800 bytes
HTML transferred:       19340800 bytes
<strong>Requests per second:    227.79 [#/sec] (mean)</strong>
Time per request:       438.995 [ms] (mean)
Time per request:       4.390 [ms] (mean, across all concurrent requests)
Transfer rate:          10818.39 [Kbytes/sec] received
 
It looks like that the A20, can support the number of request I expect.
In the next article I will test with a running wordpress site, and I will explain how to configure and optimize Apache and put your website on Internet.

Tricks to know

1)How to use Xwindow outside Olinuxino

connect to the Olinuxino with

<code class=" code-embed-code language-bash">ssh <span class="token operator">-</span>X root@ip_box</code>

After connection do

<code class=" code-embed-code language-bash">xhost <span class="token operator">+</span></code>

Now you can launch any X application directly on the box

For instance you can do:

synaptic

How to correctly set up a toolchain

Creating a tool-chain on you PC to compile for ARM, can a good idea and so for several reasons:

  • Your PC is far faster than your Box, and then you can compile all the system in several minutes whereas you would need more than half an hour.
  • You can easily automatize a night build with the latest source to test

But it is not so easy:

You have to compile for a processor than is not necessary yours (from Intel to ARM or GPU for instance) and you would also need to install native library. In this case you have to have your native libraries ans those for the ARM. In this case you cannot use package to install library, you have to do it « by hand »

To easily set up a toolchain you have to:

Install a gcc compiler for ARM. There’s a good version embedded in Ubuntu, and this is the easier part:

sudo apt-get update

sudo apt-get install arm-linux-gnueabi-cpp

For cross library like libc (which is the most important library for compilation)

How to compile the Kernel

Compiling a kernel for A20 is a little more difficult that the way is done on linux.
We need to do three important things:

  • Creating a bootstrap binary
  • Compiling a kernel
  • Compiling specific modules
  • Creating a SD Card

To simplify the process I created a script that automatizes this process,from the start to the copy to the SD card.
To use it:

git clone git@github.com:fflayol/olinuxino-lfs.git
cd system/kernel
./generate.sh

But for a pedagogic purpose I will detailed what this script do.

Creating a bootstrap binary

To begin you have to create a boostrap binary. This binary will be used to initialize and start the box when power on.
After that this binary will start the linux kernel.

sudo apt-get install gcc-4.6-arm-linux-gnueabihf ncurses-dev uboot-mkimage build-essential
git clone -b sunxi https://github.com/linux-sunxi/u-boot-sunxi.git
cd u-boot-sunxi/
make A20-OLinuXino_MICRO_config
make CROSS_COMPILE=arm-linux-gnueabihf-

Compiling the Kernel

Now the next is to compile a kernel to have a specific arm kernel, and support all features we need.
It is an official-modified linux kernel by linux-sunxi.

git clone https://github.com/linux-sunxi/linux-sunxi -b stage/sunxi-3.4
cd linux-sunxi/
cp ../olinuxinoa20_defconfig arch/arm/configs/.config
cp ../olinuxinoa20_defconfig arch/arm/configs/
make ARCH=arm olinuxinoa20_defconfig
patch -p0 < ../sunxi-i2c.patch
make ARCH=arm CROSS_COMPILE=arm-linux-gnueabihf- -j4 uImage

Compiling modules

Modules are small programs that handles different service in your box. As the kernel is « generalistic » it doesn’t includes all available. If you do not put your specific modules, you won’t be able to use « graphic acceleration » of your box. As a result you will have poor performance.
To do so:

make ARCH=arm CROSS_COMPILE=arm-linux-gnueabihf- -j4 INSTALL_MOD_PATH=out modules

This command compiles all modules and put them into out directory.

Creating a SD Card

Now as we have to compile all things,to put them altogether.
The solution is to use a SD Card of at least class 10 4GO.
We split this SDCard in two partition. The first part will include th bootstrap and the second partition will be looks like what we used to have. As this part is quite tricky I didn’t included in the script.

Put you SDCard in the reader (we assume that it can be accessed under /dev/mmcblk )

sudo fdisk /dev/mmcblk
n p 1
start: 2048 end: 34815
n p 2
leave the start and end value to default
w

Be careful when doing that you erase everything you have on your card !
Now format you partition:

sudo mkfs.vfat /dev/mmcblk0p1
sudo mkfs.ext3 /dev/mmcblk0p2

Now add files to the partition

cd ../u-boot-sunxi/
#to simply path
export card=/dev/mmcblk0
#add boot part on partition 1
sudo dd if=/dev/zero of=${card} bs=1M count=1
sudo dd if=u-boot-sunxi-with-spl.bin of=${card} bs=1024 seek=8

Now add the kernel the second partition.

cd ../linux-sunxi/
sudo mkdir -p /mnt/sdmedia
sudo mount /dev/mmcblk0p1 /mnt/sdmedia
sudo cp arch/arm/boot/uImage /mnt/sdmedia
sudo cp script.bin /mnt/sdmedia
sudo sync
sudo umount /mnt/sdmedia
sudo rmdir /mnt/sdmedia 

Now the last part is to add the rootfs and erase nominal driver by the one we’ve just compiled.

Just do the rootfs part, already described in a previous article.

Copy all files into /dev/mmcblk0p1
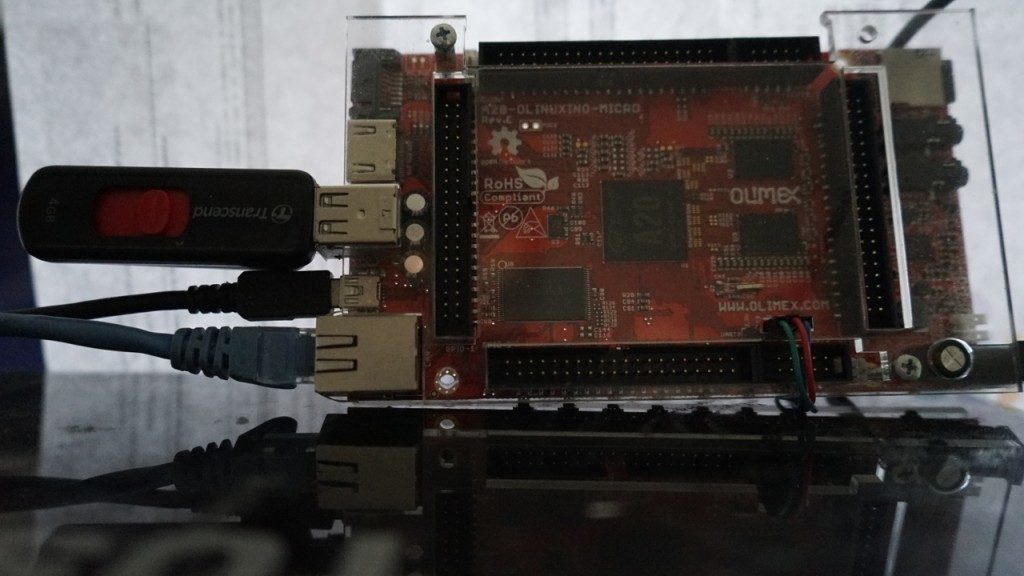
How to easily started with Mali GPU -1-

The Mali-400 is a very powerful GPU but not very easy to use.

This series of article will help you understand and use it.

First of all download « lite edition » of Sourcery from Mentor: GCC Toolchain


This includes a gcc compiler and OpenCl (support): Mali OpenCl

Be careful that the OpenCL and Gcc toolchain are 32 bits. If you use a 64bits version, be sure to install 32bits library.

To verify is everything is correctly installed type
cd Mali_OpenCL_SDK_v1.1.0/samples/sobel and type make

Depending on your environment it can be difficult to install a cross compilation, if you can not succeed you can compile directly on the Olinuxino A20, but compilation time will be longer.

How to easily create a rootfs for A20

git clone https://github.com/fflayol/olinuxino-lfs or wget https://github.com/fflayol/olinuxino-lfs/archive/master.zip 
unzip master.zip
cd olinuxino-lfs//system/rootfs/
./generate.sh

One of the most difficult problem is to create a linux rootfs. Indeed, as we use a specific target board, it can be difficult to have an up to date system.

Nevertheless I’ve found a command that can automaticly creates a  debian rootfs.

Easy way to create:
In a Xterm do:

cd system/rootfs/
second_stage.sh

Wait a while and after that a full debian wheezy rootfs will be created.

This script uses a verify useful command named debootstrap. This command will download the debian filesyem for wheezy with armhf (arm hard float, that means we have a float processor).

Problem is that this root filesystem is an « original version » that can be older than one year.

That the reason why I created a second script named second_stage.sh.

This script is called by generate in a chroot (it means that we executes the command in closed environment, the one we created with deboostrap). The ails of this script is to add deb repository, updates packages with apt and then configures statically networks interface.

Now the next step to have a fully functional environment is to :

  • add a specific kernel binary for A20.
  • configures and adds specific modules and library for A20 to enable and enhances performance.